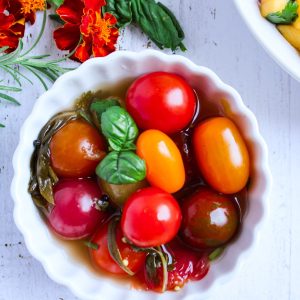
Fermented Cherry Tomato Recipe
Fermented Cherry Tomatoes are one of the best and easiest ways to preserve some of your cherry tomatoes in the garden. Fermented foods are also great for your overall health, especially for a healthy gut.
Equipment
1 mason jar, 16 ounces
Ingredients
- 10 ounces cherry tomatoes
- 1 sprig cilantro
- 2 stems basil leaves
- 1 sprig rosemary leaves
- 3 cloves garlic smased
- 1 teaspoon peppercorn
- 1 teaspoon mustard seeds
- 1 cup chlorine-free water
- ½ tablespoon pink salt or sea salt
Instructions
- Wash and dry your pickling jars.
- Make the brine by dissolving the salt in the water. Use chlorine-free water. Chlorinated water for fermentation will slow or stop the growth of the beneficial lacto-bacteria and yeasts.
- Pack the herbs, garlic, and cherry tomatoes tightly into your jars and cover with brine, leaving about 1 inch of headspace. The brine should cover the vegetables at all times or else they will start to develop mold and your fermentation may be ruined.
- Secure the mason jar lid to the mason jar (but not too tightly in order to let some of the fermentation gasses escape) and set it in a location at room temperature, out of direct sunlight.
- Let the fermentation begin. It is ready in 5-7 days. For extra sour flavor, you can leave it on the countertop longer.
- Store in the fridge for up to six months.
Notes
Recipe Notes
- Clean everything from utensils and ingredients to avoid cross-contamination.
- Make sure all the ingredients are submerged into the brine to prevent mold, especially for the first 24 hours. Use cabbage leaves or fermenting lids that you can find in the store to push down the vegetables into the brine. So long as they remain under the anaerobic safety of the brine, they’ll be safe.
- Experiment with some herbs and spices you prefer. Basil is a good combination for tomatoes for example.
- You can adjust the saltiness of the brine. I find it safer to add enough salt to help the fermentation process safely; otherwise, it may create mold issues too.
Nutrition
Calories: 23kcalCarbohydrates: 5gProtein: 1gFat: 0.4gSaturated Fat: 0.04gPolyunsaturated Fat: 0.1gMonounsaturated Fat: 0.2gSodium: 884mgPotassium: 188mgFiber: 1gSugar: 2gVitamin A: 414IUVitamin C: 17mgCalcium: 23mgIron: 1mg
Tried this recipe?Let us know how it was!